Adding images to your blog is easy, but there are three ways to do it. This post will show you those three ways.
1. Using the post's "Featured Image"
If you are wanting to add a single, intro-style image to your blog post, you should use the Featured Image. Create a new post in VSM under "Blogs". The Featured Image field is in the post editor above the main body.
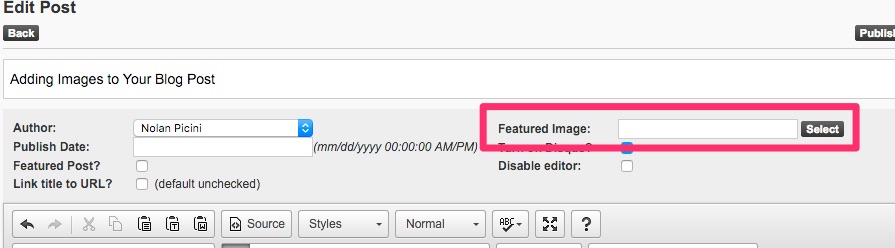
Click the "Select" button to open the image selection tool and choose your image. This will add the image at the top of your post, unless you requested otherwise in the design process of your site.
2. Using the Editor
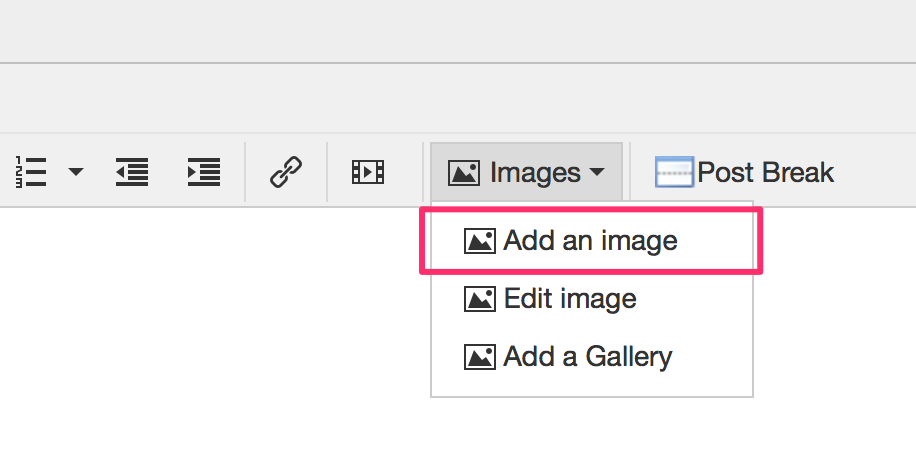
To add an image (or images) in the main body of your post, click on the "Images" button in the toolbar, then click "Add an image":
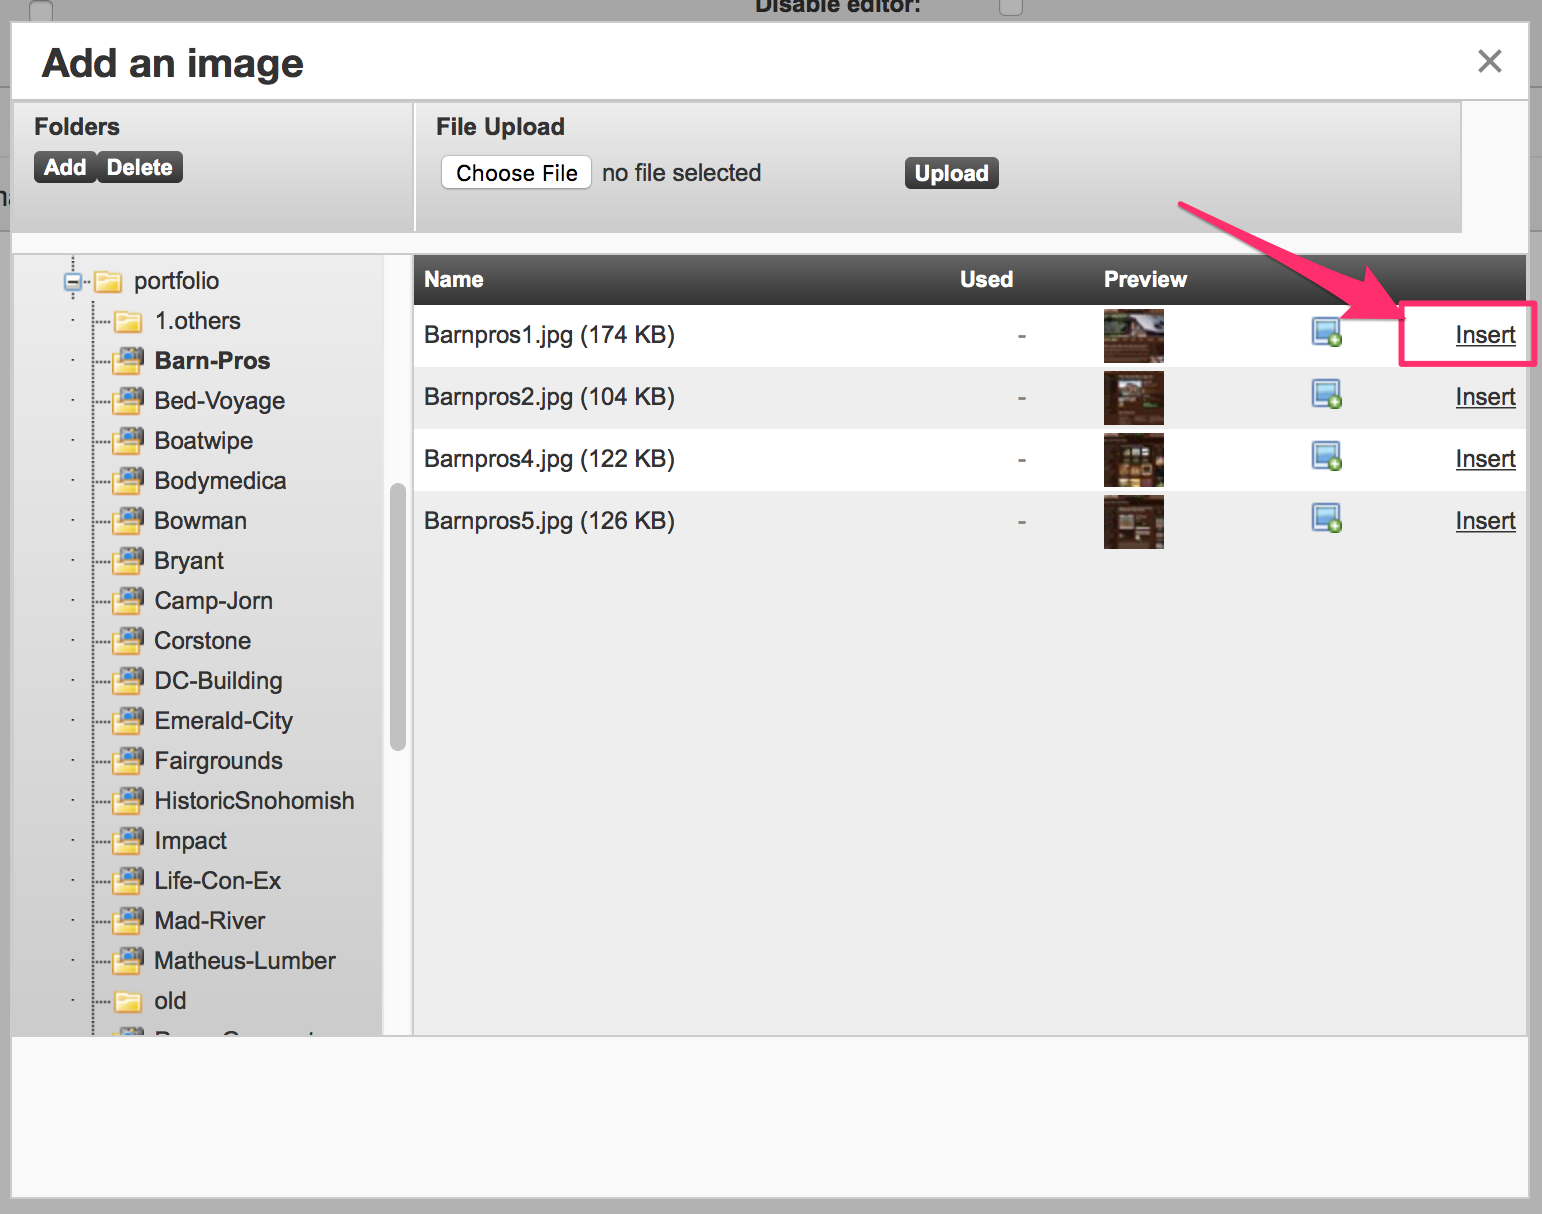
A window will now appear, and you will be able to navigate to the image that you want (or upload the image you want from your computer). Once you've found the image desired, click the "Insert" button on that image:
Your image has now been inserted into the page.
3. Using Galleries
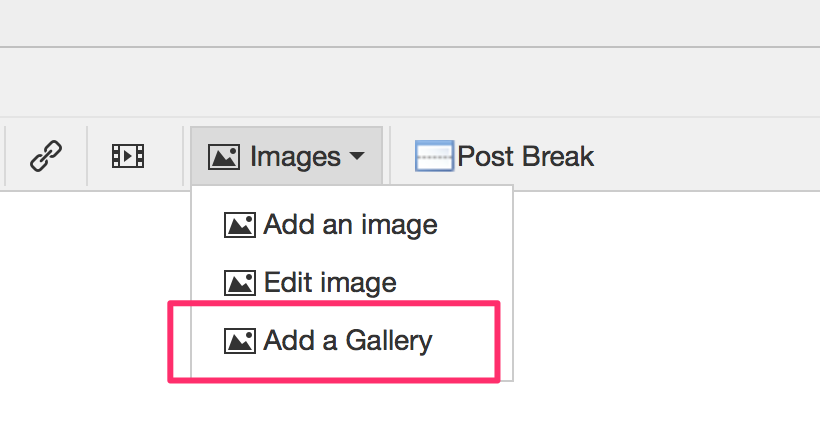
To insert a gallery in your blog post, first make sure that you have your gallery set-up (you can do that in VSM under Images / Docs >> Galleries). Once you have a gallery set-up, click on the "Images" button in the toolbar, then click "Add a Gallery":
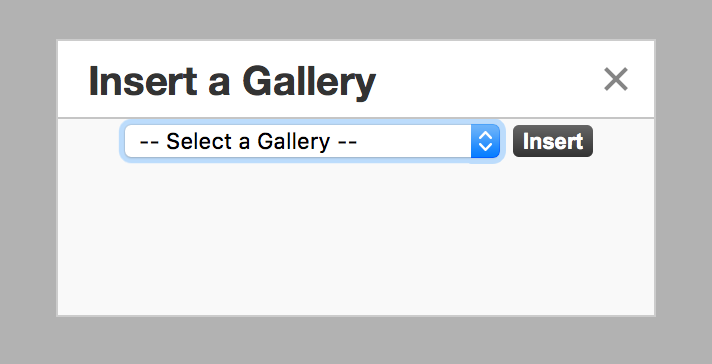
A window will then pop up. Select the gallery you want from the dropdown, then click "Insert":
Once you have inserted the gallery, it will look something like this in the editor:
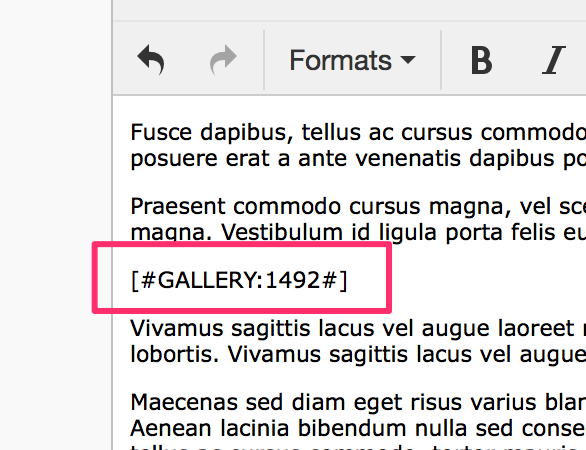
This may look strange, but once you view the post on your website, this little code snippet will be replaced with your gallery.
Feel free to contact us if you have any questions on this process.
